We covered some of the basics of these devices in an earlier series of posts, but it might be worth taking a few minutes to focus on the most basic behaviour of the lot: getting data onto the devices from a laptop. One might expect that all of these devices would operate as USB mass storage devices (plug it in and copy files on). As anybody who’s ever tried to copy data off an iPod knows, nothing could be further from the truth.
Assumptions used here: the task is to copy non-DRM’d ebook files onto an ebook reader.
Sony PRS-600, Hanvon n510, etc.
Like most of your basic e-Ink devices the Sony and its type are ridiculously straightforward to use, if a little slow, as long as you are familiar with copying files using a file manager. These devices function as USB mass storage devices. Plug it in, copy files, unplug it and (in the case of the Sony) wait for it to reindex pretty much the entire filesystem, including files that have been on the ebook reader for months. Don’t keep too many files on the Sony, or you’ll run out of battery life before you ever read a page – the indexing is the most power-hungry step it takes. The Hanvon doesn’t bother with exhaustive indexing, which saves time and battery life here but means that it doesn’t offer the same search functionality.
Filesystem speed stats were generated using:
rsync -auvh --progress --stats --no-o --no-g --no-p /some/files .
We ran this on Linux in each case, in order to ensure that there weren’t any confounding factors such as Spotlight indexing.
Results: Hanvon N510: 2.34M bytes/sec
Kindle
The Mac recognises the Kindle as a USB drive, and allows you to copy items directly onto it (.pdf or .mobi – convert using Calibre if required). It’s not all plain sailing, though; the Kindle tends to place items imported in this way into a menu section entitled ‘items not yet indexed’. When this happens, it seems that you may need to reset the Kindle (hold the sleep button for 20 seconds), at which point it will reindex on startup.
File transfer rates: 1.87M bytes/sec
We found the Kindle’s file transfer rates to be unusually slow.
Xoom
The Xoom is a somewhat frustrating device. It’s using a driver called MPT (Motorola Phone Tools). Seems this is standard to Android devices, instead of SCSI-like hard drive/mass storage, so we’ll all have to get used to it… Google’s explanation for this decision may be found on this blog post: in short, MPT is seen as an improvement on USB mass storage because
‘for devices with lots of internal memory, a manufacturer no longer needs to come up with some hard partition between the USB mass storage and internal storage. Instead, they are all in one partition, with MTP providing access to the directory of media files that would normally be available through USB mass storage. This means there is no longer a need for apps on SD card for such devices, because what used to be the ‘internal SD card’ is in the same partition as where applications are stored. The storage on your device can be used for either applications or media, depending on what you want to put on it. You aren’t stuck with how much space the manufacturer decided to leave for the two areas. Also, this means that the media storage doesn’t need to be unmounted from Android when it is being access[ed] through the PC.’
On Windows, once the appropriate drivers are installed, it can be treated like a standard storage device – you can simply drag and drop files. On the Mac you’ll need to download the Android File Transfer software, which will allow you to drag and drop files in either direction, plus or minus the occasional bug. On Linux, you can mount it through MPT using mptfs, a fusion driver for MPT drives. GNOME users will probably find that this happens automatically. The rest of us just do mptfs -o allow_other mountpoint. Android File Transfer on a Mac feels rather slow, but our test on Linux (see data below) suggests that mptfs is not unreasonably slow.
File transfer rates:
mptfs on Linux (calculated as above): 4.59M bytes/sec
Compare this to a similar test of an HP USB2 16GB USB drive: 7.66M bytes/sec
iPad
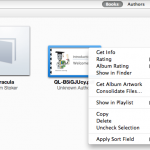
The iPad was clear winner of the ‘least cooperative’ award in this category. iDevices don’t show up in the filesystem by default. The traditional mechanism used to get files onto the device involves iTunes. This music software has been adapted after the fact for use as an ebook organiser, and its origins are still clearly visible. The results are indifferent: the right-click context menu in the ‘Books’ pane, for example, invites you to ‘download album artwork’. Using this approach, getting files onto your iPad is a multi-step process; download files, import them into iTunes, sync with iPad.
iTunes is the Vegemite of the tablet user; you either love it or hate it. Unless iTunes is a big part of your ebook-reading life already, it becomes an irritant, dragging out the file copy process unnecessarily. The OPDS approach is simpler, if all you want to do is get your files onto the iPad: just download them directly onto the iPad itself.
File transfer rates:
cannot be compared directly.
